Monday, December 14, 2009

A Hard Days Night


ToyCamera/PhotoForge on iPhone
click on thumbnail to view larger image

TiltShiftGen/PhotoForge on iPhone
click on thumbnail to view larger image

TiltShiftGen/PhotoForge on iPhone
click on thumbnail to view larger image

TiltShiftGen/PhotoForge on iPhone
click on thumbnail to view larger image

Here's a few more photos I've accumulated throughout the past 2 weeks, all shot and digitally manipulated using the iPhone 3GS and iPhone apps. I'm noticing that the iPhone's preview image is quite off compared to when viewed on a computer monitor. Contrast and saturation levels are the main issues. This resulted in a bit of back and forth, manipulating the images using the PhotoForge app to get the desired look.

Tuesday, December 1, 2009

Piperoid


Camera/TiltShiftGen/PhotoForge on iPhone
click on thumbnail to view larger image

Paper pipe robots. More fun with the iPhone, this time to test out the "TiltShiftGen" app. This app attempts to simulate the optical effect of a Toy Camera (film Box Camera). There are some interesting filters which can be applied such as the shallow depth of field and a border vignette. There's also another app called the "ToyCamera" which has more presets for color tinting but doesn't allow for much control over the bluring or vignette. In this case I would prefer to use "TiltShiftGen" and adjust the colors in "PhotoForge". I know this all sounds horrible considering I have a SLR camera which I enjoy using, but considering the fact that I'm using an iPhone 3GS I'm really interested in what the hardware along with the apps can do as a whole.

Monday, November 30, 2009

All Work and No Play


ReelMoments/ReelDirector on iPhone


This was shot with my new iPhone 3GS, using an app called "ReelMoments which is a time lapse still frame video recorder and edited with the "ReelDirector" app. The time lapse video was shot at 1 frame every 2 seconds, total film time was probably 3 1/2 hrs with about 2 hrs after editing. I wasn't successful at including audio..."ReelDirector" is still a bit buggy in the audio department. There's no option for any real post production besides the straight forward editing. I still have a slow motion app "Slowmo" and a stop motion app "iMotion" to play around with. We'll see what I can come up with.

Saturday, November 14, 2009

zombie clown...from HELL


graphite on paper
click on thumbnail to view larger image

I've been wanting to draw something with a lot of lines lately...not sure why. I find detail work helps me zone out, and hatching especially helps me loosen up my hand when I've been away from drawing for awhile. Was about to take out the India ink to work the hair. Then I wondered what hair would look like if it was straight hatched instead of contoured. The answer apparently is bandages.

ultimate alliance


graphite on paper
click on thumbnail to view larger image

Haven't tried my hand on comic book characters in awhile. I guess this sketch of Daredevil was inspired by the 23 1/2 hrs of playtime (not consecutive), it took for me to finish the full storyline in the new "Marvel Ultimate Alliance 2" videogame produced by Vicarious Visions.

In case you were wondering, I give that game a 7.5 out of 10.

Friday, August 21, 2009

Cockabilly


step 5: digital media: Photoshop
click on thumbnail to view larger image

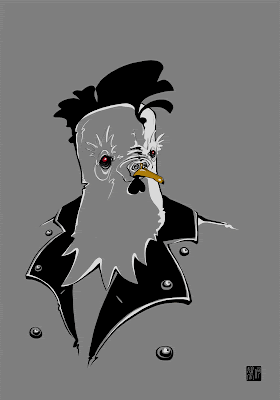
Finishing up the piece I came across a dilemma. The blacks and whites were well balanced, but I felt that the rooster's facial features were getting lost. So I cheated and added color... Sometimes you just gotta know when you're beat.

Demon Rockabilly Rooster.

everywhere a "bok-bok"


step 4: digital media: Photoshop (unfinished)
click on thumbnail to view larger image

Next step was to figure out what to do with a floating rooster head. As I had said previously in "step 2", I had no clue where this sketch was heading since I went in blindly. For some reason the rooster mohawk reminded me of a rockabilly style haircut. Another idea that popped into my head was to give the giant rooster head an octopus' lower body of tentacles...just for the sake of randomness. A few quick sketches later, it was decided that the former idea would win out.

here a "bok", there a "bok"...


step 3: digital media: Photoshop (unfinished)
click on thumbnail to view larger image

Decided not to use a pure white but instead a RGB:235 gray, so that the image would be a bit softer on the eyes. I wanted to be careful with the use of the white. Using it sparingly as lighting as well as to ground and punch up certain black lines and details.

and a "bok-bok" there...


step 2: digital media: Photoshop (unfinished)
click on thumbnail to view larger image

The rooster subject matter came about only after starting the piece. At the time of scribbling in the eyes and the main shape of the head I was thinking of the exercise of high contrast. Figuring I would need some sort of graphic element to punch up with black, I decided a mohawk would be an interesting element which I would be able to play around with. After a beak and a wattle later, a rooster came about.

a "bok-bok" here...


step 1: digital media: Photoshop (unfinished)
click on thumbnail to view larger image

Here's the first of a five step sketch/high contrast rendering done completely in Photoshop. The exercise was to create a piece using high contrast black & white on a midtone background, much like a charcoal/conté drawing.

Wednesday, August 19, 2009

fatty cow


digital media: Photoshop
click on thumbnail to view larger image

Not sure what was going through my mind for this one, but I'm pretty sure that cow is a dude.

Saturday, August 15, 2009

back on the drawing board


digital media: Photoshop
click on thumbnail to view larger image

Had some time to kill. Going to try to get back into some semblance of consistency, so it's going to be sketches for the next few. Here's to hopeful optimism!